468x60 Ads

Showing posts with label ICT. Show all posts

Sunday, July 20, 2014

How to restore My Computer, Recycle Bin, and other Windows icons to your Win 8.1 desktop

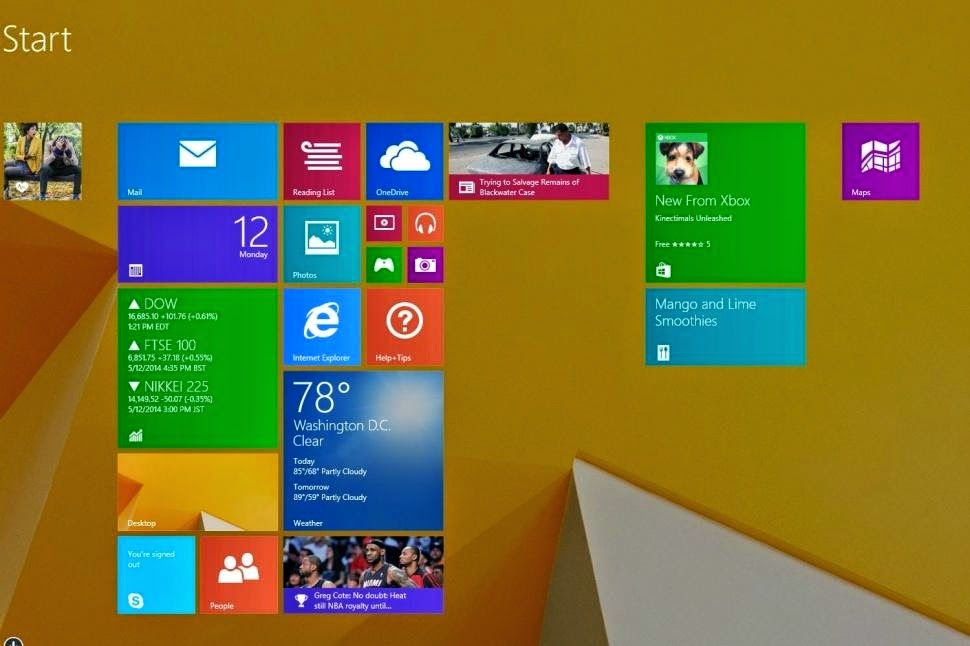
At this point, Windows 8 is approaching two years of age. If you’ve recently abandoned Windows XP in favor of the new OS, or you’re a student who just bought a new computer while making the jump from Windows 7, it’s possible that your desktop doesn’t contain all of the classic desktop icons you might have grown so accustomed to over the years. I’m talking about things like My Computer, Control Panel, Recycle Bin, My Documents, and Network.


This wouldn’t be so bad if you can just click on the Start menu like in Windows 7 and open them right from there, but considering that there is no real Start menu in Windows 8.1 (for now), your best bet for getting quick and easy access to these parts of Windows is by telling the OS to restore those icons to your desktop. Don’t know how to pull it off? We’ll show you!


How to restore classic Windows icons to your Window 8.1 desktop


If you’re at the desktop, press the Windows key on your keyboard and type “Recycle Bin.” Windows’ Search charm will immediately pull up some results. One of those should be called “Show or hide common icons on the desktop.” Click on it, and by doing so, you will open a small window called “Desktop Icon Settings.” Keep in mind that Microsoft has renamed My Computer to This PC.

There’s just one tab in this window, populated by five check boxes. Each of these boxes will have one of the classic Windows icons next to them. If any of those icons aren’t on the desktop, it’s because the check boxes next to each of them is blank. Click on the check boxes next each icon that you want to populate your desktop with, and click “Apply,” then hit “OK.” Voila, you’re done! The icons should be back to where you’re used to seeing them.

Sunday, May 4, 2014

Difference between LCD and CRT

Key Difference
 LCDs (Liquid Crystal Display) are displays that use liquid crystals sandwiched between two sheets of polarizing material. The images are displayed when electrical charge is applied to the crystals. 
CRTs (Cathode Ray Tube) are vacuum tubes that use electron guns and fluorescent screens to display images. CRTs and LCDs vary greatly and LCDs are replacing CRTs in today’s world. LCDs are lighter, slimmer and consume less power compared to CRTs. However, CRTs have a sharper image quality compared to LCDs.


LCDs (Liquid Crystal Display) are displays that use liquid crystals sandwiched between two sheets of polarizing material. The images are displayed when electrical charge is applied to the crystals. An LCD uses a select type of liquid crystal known as twisted nematics (TN), which are twisted in shape. Applying a current to these crystals causes them to unwind to a certain degree depending on the voltage. A LCD is in a layer formation, it starts with a mirror on the back for reflection, followed by a piece of glass that has a polarizing film on the bottom side, and a common electrode plane made of indium-tin oxide on top. After that is a layer of liquid crystals, followed by another piece of glass with an electrode and another polarizing film, which is at a right angle to the first one. The LCD is then hooked up to power source that provides a charge to the crystals and causes them to create an image on the screen. LCDs also have a backlight that makes the image visible to the user.


CRTs (Cathode Ray Tube) are vacuum tubes that use electron guns and fluorescent screens to display images. A heated filament or ‘cathode’ is in a vacuum in a glass tube, while an electron gun pours electrons into the tube and the electrons are attracted by the positive anode in the tubes. The screen is coated with phosphor, which glows after is hit by the electron gun. Color CRTs have three different electron guns, one for each primary color. A shadow mask, thin metal screen filled with holes, is used to control the points where the electron beams passes to focus on a single point on the CRT’s phosphor surface. Another method is an aperture-grill, which uses tiny vertical wires. Aperture-grill displays are more expensive compared to shadow mask CRTs. However, CRTs are becoming obsolete as it is being replaced by LCDs, OLEDs, Plasmas, etc.

Thursday, May 1, 2014

Star Topology


Advantages

▸ Due to its centralized nature, the topology offers simplicity of operation. 
▸ It also achieves isolation of each device in the network.
▸ Adding or removing network nodes is easy, and can be done without affecting the entire network.
▸ Due to the centralized nature, it is easy to detect faults in the network devices.
▸ As the analysis of traffic is easy, the topology poses lesser security risk.
▸ Data packets do not have to pass through many nodes, like in the case of a ring network. Thus, with the use of a high-capacity central hub, traffic load can be handled at fairly decent speeds.

Disadvantages

▸ Network operation depends on the functioning of the central hub. Hence, central hub failure leads to failure of the entire network.
▸ Also, the number of nodes that can be added, depends on the capacity of the central hub.
▸ The setup cost is quite high.

Chromecast users can now send Google Drive presentations to the big screen

If you’ve been using Google Drive to make presentations, get ready to have a whole lot more versatility when it comes to showing them off, thanks to the Chromecast. Up until now, only a select few users were able to cast their Google Drive presentations to the big screen with the tech giant’s handy little dongle. But Google has been working on getting the feature polished off for a full public release and – detailed in a report by The Next Digit – it now appears to be up and ready to use, despite the lack of any official press release. 

To take advantage of the new functionality, you’ll first and foremost need a Chromecast, which is still available for just $35 via Amazon. Before any casting can occur – just as with Netflix and other Chromecast-supported extensions – you’ll also need to have the Google Cast extension installed on your browser, and your computer must be connected to the same Wi-Fi network as your dongle. Then, once you have a presentation open in Drive, just click the “Present on another device” option under the “Present” menu, and choose the device you want to cast to. 

For now, the new Chromecast functionality is available only within the desktop version of Drive. Mobile support has yet to be announced. 

With this new functionality, Drive joins the growing number of apps and services supported by the innovative Chromecast. For more tips, tricks, and best practices for Drive, check out our helpful guide to the service – and while you’re at it, here are five ways to use your Chromecast outside the box, and another 18 tips and tricks for getting the most out of the device.

Monday, April 28, 2014

Apple will fix iPhone 5 handsets with faulty sleep/wake buttons

Apple has launched a replacement program for any users affected by a broken sleep/wake button on the iPhone 5. Some handsets manufactured after March 2013 have faulty mechanisms that can lead to problems with the switch, and as a result prevent the device from being turned off and on or locked in the usual way.


“Apple has determined that the sleep/wake button mechanism on a small percentage of iPhone 5 models may stop working or work intermittently,” says Apple on the program’s official page. “iPhone 5 models manufactured through March 2013 may be affected by this issue. Apple will replace the sleep/wake button mechanism, free of charge, on iPhone 5 models that exhibit this issue and have a qualifying serial number.”


Head to the replacement program page and enter your device’s serial number to see if you qualify for a free repair. If you do, then you can send your iPhone for inspection through the mail, or call in at an Apple Store or other authorized service provider. If you choose to take your handset to a store you can get a 16GB iPhone 5 on loan while yours is fixed.

The program is live in the U.S. and Canada today, and expands to other countries on May 2. The deal is good for up to two years after the device in question was purchased, so if your iPhone 5 hasn’t yet shown signs of the problem then there’s still plenty of time for you to make a claim. Although Apple says that only a “small percentage” of devices are affected, the issue does seem to have been reported widely by users.

What are some of the differences between a GIF, a JPG, and a PNG?

There are a bunch of different photo file types floating around, and knowing which one is right for you may not be the simplest thing to figure out. JPG (or JPEG), PNG, and GIF files are likely to be what you’ll come across most often, and each has its strengths and weaknesses.

Although most browsers have no trouble displaying any of these three image types, some are better suited for certain uses than others. For instance, while JPGs are most commonly used for displaying photo-realistic images that look fine while maintaining a low file size, GIF files are a widely-supported format for animated images. Then there are PNGs, which have the ability to maintain full quality in nearly all instances.

Here’s our breakdown of the differences between JPG, PNG, and GIF files. Also, feel free to check out our guides on to how to make an animated GIF using Photoshop, and how to convert a PDF to JPG.


Compression


To ensure that images are manageable when used with most applications, they must be compressed, which reduces the size of the photos. Here’s the difference between compression with GIF, JPG, and PNG files.

JPG:  JPG compression is great if you’re just trying to send someone a picture through your phone or in an email, two situations where you might not necessarily want to send large files. Although most JPGs look fine from a distance under normal compression, there is a noticeable loss of quality whenever users zoom in on a JPG image. The effects of JPG compression have been greatly exaggerated in the image below to show the loss of quality that occurs.


GIF: Unlike PNG and JPG files, GIFs force all the colors of an image into a 256-color palette in order to reduce image size. However, these color limitations often lead to immediately-noticeable coloring issues, usually appearing as white spots or blotches of color, where images should be more complex. The circled area in the image below highlights a region where the effects of compression are most obviously apparent. Any colors outside of the 256 found in the standard Web palette are changed to whatever color is closest to it, creating blotchy patches as a result.


PNG: PNG files are a lossless format, meaning that compression doesn’t affect the quality of the image. Unlike JPGs, which create artifacts and blur images at a certain point, a PNG file will always look at least as sharp as the original image. Unfortunately, PNG files also tend to be a bit larger than JPG files, especially when they’re high resolution. This could make them difficult to share to the Web, or between friends and family.


Transparency


GIF: GIFs assign one of 256 colors to be transparent. However, this does come with some limitations. Adding transparency removes a color from an already limited palette, and pixels are either totally clear or opaque, with no in-between. Additionally, round edges will feature a white backing as opposed to sitting directly against the background, contrary to the nicely-defined edges in the PNG below.


PNG: PNG files sport the best capacity for transparency. PNGs create transparency in one of two ways. One of these methods employs the same approach used by GIFs, with a single color defined as transparent, and the other is to set an alpha channel. One of the advantages of PNG single-color transparency is that it doesn’t remove a color from the available palette. However, the alpha channel is a much smoother method, as it is far better at blending colors, and allows you to select different levels of transparency in specific regions. The transparent areas of the PNG will blend and adjust naturally to whatever is behind the image when the background of the page isn’t a solid white or black color. As shown above, the edges all fade from fully colored to partially transparent, subsequently creating a cleaner edge and smoother background transition.

JPG: Unfortunately, JPGs don’t support transparency. JPG files have an unlimited color palette, but they blend pixels together to reduce the size of the image.


Animation


JPG: Although JPGs don’t support animation, a Motion JPEG format exists that accommodates both animation and sound. However, it isn’t widely used on the Web, and is primarily used for storing and transferring video on small, low-end devices such as digital cameras and portable game consoles.

PNG: While there was an effort to create a protocol for animated PNG files, it hasn’t caught on, and thus hasn’t received support from most major browsers. The format has some specific uses, such as medical imaging and geographical work, but isn’t widely used on the Internet.

GIF: Almost all of the animated images you’ll find on the Web are GIFs. A couple of reasons why GIFs are popular are their efficient file size, and simple creation process. Moreover, a number of the format’s built-in features allow for acute control over specific animation behaviors — including animation speed, whether the frames are persistent, and how many times the animation repeats.


Conclusion


JPGs, PNGs, and GIFs have benefits and limitations, and it’s more important to know when to use each file type. As a general rule, you’ll want to use a GIF whenever the image is to be animated. Beyond that, JPG compression tends to create smaller file sizes at the cost of image quality. However, PNGs are better for capturing lossless images, and in situations where minimizing file sizes isn’t of utmost importance. Ultimately, situational considerations should be weighed heavily when deciding which of these file types you should use.

Tuesday, April 22, 2014

Microsoft to use Bing search data to predict outcomes of reality shows

You can use search data to detect patterns in an arguably endless array of behaviors across infinite subjects. This includes the results of reality TV shows, which Bing will attempt to predict, according to an official blog post from Microsoft.
Beginning today, Bing will attempt to fo
recast the results of shows like “The Voice,” “American Idol” and “Dancing With The Stars,” by scanning search data, along with “social input” from Facebook and Twitter. For instance, if you head over to Bing right now and search “American Idol predictions” like we did, the top of the page will feature a set forecasts for five singers. We’ll refrain from adding in any potential Bing-generated spoilers here, but you’re free to check out what the search engine thinks for yourself.
“In broad strokes, we define popularity as the frequency and sentiment of searches combined with social signals and keywords. Placing these signals into our model, we can predict the outcome of an event with high confidence,” the Bing Predictions Team says in its blog post.
Microsoft also says that Bing’s predictions incorporate numerous emotionally-driven factors into how it generates predictions, allegedly accounting for biases like favoritism, regardless of how a person’s favorite singer/contestant performs from one week to the next.
Bing’s prediction service won’t start and end with reality TV shows though.
“You can expect more from us in this area beyond predictions for voting shows like The Voice, American Idol and Dancing With the Stars,” the Bing Predictions Team says.
We can’t help but wonder what Bing will be attempting to predict next, and how accurate the search engine’s forecasts will be. What’s clear is that we won’t have to wait too long to find out

Friday, April 4, 2014

Samsung Galaxy S5 Release Date: Just one week left till launch

The Samsung Galaxy S5 release date is now just one week away, with the Korean manufacturer’s latest flagship phone to hit UK retailers on April 11.


Having been formally unveiled a little under six weeks ago, the wait to get your hands on the Samsung Galaxy S4 follow-on is almost over. The Samsung Galaxy S5 release date will be held alongside the launch of the newly confirmed Samsung Gear 2 and Samsung Gear Fit.

On April 11 we will launch these great products in almost 150 countries,” Jean-Daniel Ayme, Samsung’s Vice President of European Telecommunication Operations announced during the phone’s formal unveiling back at MWC.

Although Samsung has yet to announce an official Samsung Galaxy S5 price, the phone has started cropping up on retailer's online stores priced from £579.95 on a SIM-free basis.

Ahead of the Samsung Galaxy S5 release date, check out out 'Where to buy the Samsung Galaxy S5' page for all the best and latest deals.

Samsung Galaxy S5 Features


Arguably the most eagerly awaited handset of the year, the Samsung Galaxy S5 was first shown off at MWC 2014.

Moving to a 5.1-inch display, the plastic bodied handset is powered by a new 2.5GHz quad-core Qualcomm Snapdragon 801 processor and runs 2GB of RAM.

With an integrated fingerprint scanner and rear-mounted heart rate monitor, the Samsung Galaxy S5 specs sheet is further bolstered by a 16-megapixel rear-mounted camera and 2-megapixel forward-facing snapper. The phone will launch in four colour schemes, black, white, blue and gold.

Running Google’s Android 4.4 KitKat OS and Samsung’s newly finished TouchWiz UI, the Samsung Galaxy S5 features list sees a 28oomAh Lithium-battery promise a 10 hour LTE browsing battery life.

The phone lines up at 8.1mm thick and 145g in weight and will be available in 16GB or 32GB storage options.

Thursday, April 3, 2014

Bus Topology : Advantages and Disadvantages

What is Bus topology? 


Bus Topology is the simplest of network topologies. In this type of topology, all the nodes (computers as well as servers) are connected to the single cable (called bus), by the help of interface connectors. This central cable is the backbone of the network and is known as Bus (thus the name). Every workstation communicates with the other device through this Bus. 

A signal from the source is broadcasted and it travels to all workstations connected to bus cable. Although the message is broadcasted but only the intended recipient, whose MAC address or IP address matches, accepts it. If the MAC /IP address of machine doesn’t match with the intended address, machine discards the signal. 

A terminator is added at ends of the central cable, to prevent bouncing of signals. A barrel connector can be used to extend it. Below I have given a basic diagram of a bus topology and then have discussed advantages and disadvantages of Bus Network Topology
bus topology diagram,physical bus topology, linear bus network topology, wiki wikipedia

Advantages (benefits) of Linear Bus Topology


1)  It is easy to set-up and extend bus network.
2)  Cable length required for this topology is the least compared to other networks.
3)  Bus topology costs very less.
4) Linear Bus network is mostly used in small networks. Good for LAN.

Disadvantages (Drawbacks) of Linear Bus Topology


1)  There is a limit on central cable length and number of nodes that can be connected.
2)  Dependency on central cable in this topology has its disadvantages.If the main cable (i.e. bus ) encounters   some problem, whole network breaks down. 
3)  Proper termination is required to dump signals. Use of terminators is must.
4)  It is difficult to detect and troubleshoot fault at individual station.
5)  Maintenance costs can get higher with time.
6)  Efficiency of Bus network reduces, as the number of devices connected to it increases.
7)  It is not suitable for networks with heavy traffic. 
8)  Security is very low because all the computers receive the sent signal from the source.

Wednesday, April 2, 2014

Samsung launches 28-inch 4K billion-color UD590 monitor


Time to get that second graphics cards, guys: Samsung has announced that its 28-inch 4K UD590 monitor will soon be available in the US for the paltry sum of $700. The UD590 packs a 28-inch 3840×2160 TN panel (157 PPI), capable of displaying 10-bit color (1 billion colors) at 60Hz with 1ms GTG response time. Priced at $700, this is probably your best bet if you want to try your hand at 4K gaming — or, if you’re a creative of some kind, the idea of 10-bit color on a 4K display should be very, very alluring.

From what we can tell, the UD590 has been available as a gray import from South Korea for a month or two — but now Samsung is preparing to launch it officially in the USA. Design-wise, the UD590 has a very minimal stand and bezel that’s finished in silver and black — in my opinion it’s much more attractive than the Dell P2815Q, the other $700 4K monitor that’s currently on the market. There are no DVI connectors, two HDMI connectors, and a single DisplayPort connector (which is what you need to use, if you want 3820×2160 @ 60Hz).


But enough about the minutiae — let’s get down to nitty-gritty here. In particular, that 10-bit TN (twisted nematic) panel. As you may know, in today’s market, there are two primary underlying technologies used in LCD displays: TN and IPS (including Samsung’s PLS). TN is cheap and fast, but IPS has wider viewing angles and generally better color fidelity. Personally, I have never heard of a 10-bit TN panel before; usually, if you want 10-bit color (10 bits per pixel, or bpp) you have to spend a lot of money ($1000+) on a professional-grade IPS monitor. To think that you can get a 10-bit 4K monitor for $700 makes me a little dizzy.


Unfortunately, even though the UD590 has been available as a gray import, none of the reviews online appear to mention the monitor’s color fidelity/image quality. The official Samsung specs don’t offer much in the way of guidance, except to say that it can display 1.07 billion colors, that it has 1-millisecond gray-to-gray (GTG) response time, standard 300 cd/mbrightness and 1000:1 contrast (or 10,000,000:1 dynamic contrast, if you prefer), and that there’s the usual poor viewing angles associated with TN panels.


Unfortunately, even though the UD590 has been available as a gray import, none of the reviews online appear to mention the monitor’s color fidelity/image quality. The official Samsung specs don’t offer much in the way of guidance, except to say that it can display 1.07 billion colors, that it has 1-millisecond gray-to-gray (GTG) response time, standard 300 cd/mbrightness and 1000:1 contrast (or 10,000,000:1 dynamic contrast, if you prefer), and that there’s the usual poor viewing angles associated with TN panels.


Tuesday, April 1, 2014

HOW TO MAP A NETWORK DRIVE

You could back up your data on an external hard drive, but what if you need to access important files or information that’s located on a computer other than your own? Mapping networked drives grants users remote access to content stored on a server or network-attached storage device.

However, granting access to networked drives can be tedious. Fortunately, both Windows and Mac OS X make it easy to map a network drive, and neither method requires more than five minutes of your time.

Here’s our guide on how to map a network drive. Additionally, check out our top picks for the best external hard drives and our basic guide on how to buy an external hard drive.


Mapping a network drive in Windows 7


Step 1: Click the Start menu and select Windows Explorer from the resulting drop-down menu.

Step 2: Once open, select the Computer section located on the left-hand side of the window and click the Map network drive button near the top.


Step 3: 
The resulting setup wizard provides options for both manually specifying the network address, or browsing for it among systems on your network. Click the check box directly to the left of “Reconnect at login” if you wish to automatically re-establish the connection every time you start your computer. If the networked drive requires log-in credentials other than those used for your computer, check the “Connect using different credentials” box below and enter your credentials when prompted. Click Finished in the bottom-right corner when done.


Mapping a network drive in Windows 8


Step 1: Enter the Modern/Metro UI, type “File Explorer” and select it from the list of results that appear on the right side of the screen.


Step 2: Once open, select the “Computer” section located on the left-hand side of the window, click the “Computer” tab at the top, and select the “Map network drive” option.


Step 3: The resulting setup wizard provides options for both manually specifying the network address, or browsing for it among systems on your network. Click the check box directly to the left of “Reconnect at login” if you wish to automatically re-establish the connection every time you start your computer. If the networked drive requires log-in credentials other than those used for your computer, check the “Connect using different credentials” box below and enter your credentials when prompted. Click Finished in the bottom-right corner when done.


Mapping a network drive in Mac OS X


In Mac OS X, there is a shortcut that makes it easy to map and access network drives without any extra software.

Step 1: Make the Finder utility active, hold the Command key and press the “K” button to bring up the appropriate server connections. If Finder is not active, click the blue face icon within the Mac OS X Dock before entering the keyboard command.


Step 2: The resulting window provides options for both manually specifying the network address, or browsing for it among systems on your network. Select the appropriate server and click the “Connect” button in the bottom-right corner of the window when finished.


What do you think of our guide on how to map a network drive? What do you frequently use networked storage for? Let us know in the comments below.

Monday, March 31, 2014

How to install Flash on an Android phone or tablet

When Google released its Android 4.1 Jelly Bean operating system in July of 2012, Flash support on Android powered devices found itself on the cutting room floor, no longer downloadable in the Google Play Store. Convenient for watching TV on your phone or playing those addictive online games, Flash was an application that set Androids apart from the rival iPhone; for better and worse. 
Yet, now that Android users must operate their phones out-of-the-box sans Flash, the want for a way to get the software again has been great. Luckily, Adobe realized this need and allows Android users to download its Flash player. To make things easier, Adobe made the download available straight from the website.

We want to point out that because Adobe is no longer supported on Android powered devices, you won’t find any security updates, bug fixes, or official Adobe support. Furthermore, you may also experience some significant stability issues when downloading and using Flash. The stability issues tend to be worse with Android devices running Jelly Bean 4.1 or newer, as that operating system ditched Flash altogether.

For those looking for a Flash fix, we’ve put together this easy how-to guide to get Flash back on your Android phone or tablet in no time. Before we get to the rundown, you’ll want to make sure that your phone or tablet is running an OS between Android 2.2, and 4.1. You can find which OS your device is running by going to Settings > About phone (or About tablet). 

Note: if you are using Android 4.1 (Jelly Bean) or newer, you’ll want to use a stock browser other than Google Chrome for the Flash install. Chrome does not support Flash Player whatsoever for that operating system.

For other Flash related content, check out our picks for the top 15 Flash games to play on your night off, as well as our rundown of how to download Flash videos.


Step 1: Configuring Security Settings


Once the prerequisites above are in order, the real fun of installing Flash on your Android device can begin. First, access your phone’s security settings to allow for application downloads outside of Google Play. To do this, go to Settings > Applications (for older Android operating systems), or Settings > Security (for Android 4.1 Jelly Bean), and check the box next to Unknown sources. It should ask you to confirm your selection, and select OK if that is the case. Now that the security settings have changed, navigate back to your home screen and open your mobile browser. Again, Google Chrome will not work for this on Android devices using Jelly Bean 4.1 or newer.


Step 2: Downloading Flash from the Adobe Site


Navigate to Adobe’s Flash Player archives in your browser and scroll down until you arrive at the listings for Android Flash player downloads, where you’ll find two separate sections: one with download links for recent operating system versions and one for versions compatible with Android OS 2.1-2.3 and 3.0. Adobe’s most recent Flash Player updates for Android (11.1.111.73 for Android 2.x and 3.x and 11.1.115.81 for Android 4.0.x) were released on September 10, 2013, and lead off the top of both sections. It’s recommended that you choose the most recent compatible download for your Android device.

Once you click on the compatible download, the Flash Player Installer should begin automatically. When the download completes you can navigate back to your home screen or close the browser.


Step 3: Installing Flash Player


Next, access the Notifications on your phone and tap on the file titled “install_flash_player.apk.” Once you see the download alert, tap Install to begin installing Flash on your Android device.


Simply tap Done after the installation completes and click back into your phone’s stock browser to enable the new plug-ins. If you are using an Android 3.0 or later, go to your browser’s Menu then click Settings > Advanced > Enable Plug-ins. If you’re using Android 2.2, or 2.3, enter your browser’s Menu and click on More Settings > Enable Plug-ins. Once the plug-ins are active, your Android phone should begin using Flash. You can run a Flash test by visiting this site; you’ll see a brief Flash animation at the top, and version information for the device.


Step 4: Re-activating Security Settings


Now that the download is complete, be sure to go back in to your Settings folder (Security folder for Android 4.1 users) and de-select the Unknown sources box to keep your Android device secure. Once the security settings are back to normal, you’re free to use Flash Player on your Android phone or tablet.